Although experienced embroiderers know tensions as well or better than their pets, new commercial embroidery machine owners are often just learning thread tensions. I cannot claim that I am a perfect "tensioneer", but after several years of running machines, attending seminars and working closely with machine technicians hopefully I can get you off to a little better start.
Bobbin Tension
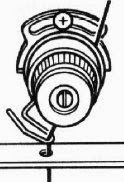
 The most common denominator involved is your bobbin tension, as there's only one bobbin and often several needles. When manually pulling thread from your bobbin case your bobbin tension should feel like it is running smoothly through the bobbin case, and you should feel a slight resistance, making little effort to pull the bobbin thread out yet feeling like something is holding it back by a only a slight amount. The bobbin tension is adjusted with the larger of the two flat head screws on the side of your bobbin case. Righty=Tighty, Lefty=Loosey.
I recommend keeping the "perfect small screwdriver" near the machine for changing needles and making the bobbin tension adjustments, as well as a tooth brush for cleaning the bobbin case. The bobbin case collects dust and often a wax build up as the machine runs. You should clean the bobbin case when you see buildup starting to occur, that will assure you are running smoothly with no potential sewing problems or tension issues. I also like to hit it with a can of compressed air and blow out the hook area on the machine as well to clear the dust and thread.
TIP: When running caps most machines like to run better with a little more tension on the bobbin.
 Some bobbin cases come with a spring inside which runs the bobbin nicely in some machines, but not all machines. I have found that removing the spring improves the bobbins runability in Tajima and ZSK. When running a test design, try the bobbin case with and without to see if your machine likes to run it with that configuration. To remove the spring, use the handy "perfect small screwdriver" you have for adjusting the tension.
Upper Thread Tension
Once you are fairly confident your bobbin tension is close to where it needs to be (alot of this you learn from experience), you can then check your upper thread tenions. These are adjusted by the tension knobs located on the front of the sewing head, and often have one or more smaller pre-tensioners above those. The first rule of thumb is to make sure your thread is pathed correctly for each needle, running through the machine very smoothly and wrapped around the tension wheel according to the specs your machine uses. Usually this is one and one half times clockwise around the tension wheel, then over the check spring and down to the take up levers.
TIP: Clean the areas in and around your tension knobs, felt and check spring weekly for proper machine maintenance. If these areas collect too much dust they often start causing false thread break errors and tension issues. I also like to keep some small disposable nail files handy for cleaning the thread break sensors where the check spring contacts them.
 What I generally do is pull the thread through the needle and out towards me, adjusting the tension to where it feels slightly tighter than the bobbin tension feels and making sure nothing is altering the path of the thread running through its course. You can also get tension guages for both upper and lower threads by the way, Ill try to add a source to this article in the near future. You might need to play with the pre-tensioners from time to time, they should just barely be slowing the thread down on its way to the larger tension wheel and simply acting as a guide, managing the slack or memory the thread may have.
I then run a little tension test file consisting of one column of satin stitches for each needle on the machine. I run this test every day before running the machine to assure that things are running properly. It only takes a few minutes to save hours of headaches. After running the tension test, have a look at the top stitching and look closely for any looping or any bobbin appearing on the sides if the column.
TIP: When running metallic thread you will often find that the thread has a little memory coming off of the spool, making a slight twisting shape as it runs through the machine. I find it runs well if I take the thread cone off of the machine and place it either on the back of the machines table top, or even further back hanging on a wall or sitting on a separate table. This allows the thread more room to unwind itself before getting to the machine.
 Then, flip the design over and look at the back. This is where we can get a visual on the actual tension settings and try to tune them in a bit. What you are looking for on the back is about 1/3rd bobbin thread, right down the middle of each column. If too much bobbin is showing, loosen the upper tension. Not enough bobbin showing, tighten the tension. Again, Righty=Tighty, Lefty=Loosey.
Repeat process as necessary until you have them adjusted nicely. Keep in mind, sometimes the issue is bobbin tension and sometimes it is upper tension. Smooth running, good tensions are a marriage between the two. With a little practice and a little experience, you will be able to tune up your tensions quickly before production every day.

Thread Tensions Tutorial Stitch File
FREE!

Cart: items | Total: